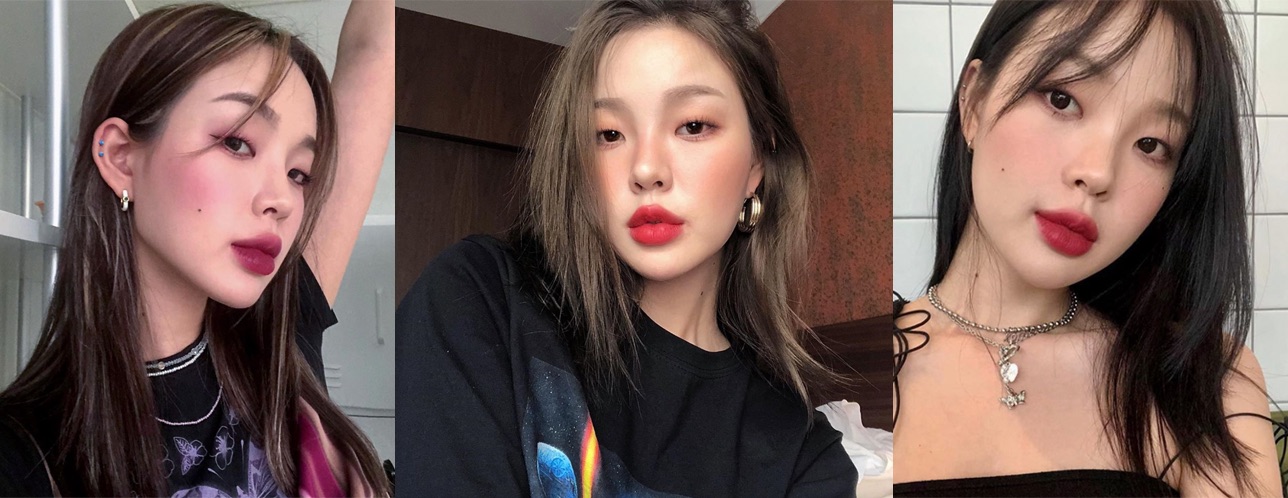
I never really thought of makeup as something to transform my appearance — I usually stick to a pretty natural makeup look, with a smokey eye as the furthest I’d go out of my comfort zone. For a long time, I stuck to 3 basic products: BB cream, highlighter and the occasional lip tint. However, once I started to experiment more and tried out new products to add to my collection, I fell in love with one product that I can’t believe I went so long without — blush.
When I first begun experimenting with blush, I wasn’t too sure where exactly to place the product on my face. After multiple YouTube tutorials and looking up inspiration pictures on Instagram, I’ve found 3 particular blush placements that look good on any face shape, and can add a little edge or soften your look, depending on what you’re going for. Rather than simply applying blush the traditional way, on the apples of your cheeks, these three alternatives are an easy way to add some extra colour to your look.
1. Sun-Kissed Blush

Probably the style I go for most often, there’s the sun-kissed blush look that’s become increasingly popular in the last couple years. Rather than simply placing the blush on the apples of your cheeks, go a little further and extend it over the bridge of your nose.

1. RMS Beauty Pressed Blush in Lost Angel ($40)
2. M.A.C Cosmetics Glow Play Blush in That’s Peachy ($49)
3. NARS Blush in Torrid ($52)
For this look, a coral-toned blush works best to provide a natural-looking shade that imitates the flushed effect you can get after hours in the sun. I personally use a lighter hand when applying the product over my nose so it’s a little less saturated than the blush on my cheekbones.
2. All-Over Blush

The second look I usually go for is a more diffused blush effect that I use when I’m heading out at night. Compared to my usual blush application, I typically do this when I don’t feel like using a bronzer, and this adds a subtle contour to the face, especially if you use a darker shade. This is an elevated version of the traditional method of using blush on the apples of your cheeks — extend the product towards the front of your face and lengthen where you’d usually place your blush.

1. Marc Jacobs Beauty Air Blush in Flesh & Fantasy ($68)
2. KVD Vegan Beauty Everlasting Blush in Honey Suckle ($38)
3. Hourglass Ambient Lighting Blush in Mood Exposure ($67)
Since you’re adding more colour to your face, go with a more neutral shade of blush that’s close to your skin tone so it doesn’t overwhelm your look. Start off with a light hand and layer the blush on gradually until you get your desired look to prevent over-applying the product, which could make your face look a little too red.
3. Flat Blush

Lastly, I’ve recently been trying out a flatter blush effect that I feel adds more edge to my usual makeup routine. Similar to the all-over blush look, apply more product to the side of your face but extend it a little higher than you would normally place your blush, almost like you’re applying highlighter. I find that this method lengthens the face while shaping the cheekbones a bit more. Combine this with your usual bronzer and you’re good to go!

1. Fenty Beauty Cheeks Out Freestyle Cream Blush in Summertime Wine ($33)
2. DIOR Diorskin Rouge Blush in 962 Poison Matte ($73)
3. Sephora Collection Colorful Blush in 22. Love Sick ($22)
I’d go with a darker, plum-toned blush to make the look a little stronger. Since you’re extending the blush on the sides of the face, there’s a bit more room for experimentation and you can afford to apply a little more product than usual. I’d pair this with a lip product of a similar shade to bring the entire look together.


You must be logged in to post a comment.